Pages

Tuesday, May 17, 2016

DIY Mocha Icing


Espresso is the base of most fancy coffee drinks - lattes, cappuccinos, macchiatos, and mochas.  One of my favorites is a mocha - hot chocolate mixed with espresso.  I found an easy way to bring espresso to your dessert with two-toned mocha icing.


Bill of Materials
Chocolate Icing
Vanilla Icing
Espresso


First mix your icings - one spoon full of vanilla in the chocolate and one spoonful of chocolate in the vanilla.  This mix will provide the chocolate base needed, but with a light chocolate and dark chocolate. 


Next add about a shot of espresso (approximately two tablespoons) to each bowl of icing and mix thoroughly!  The smell is delish!


Use icing, as you normally would on cakes, brownies, coffee cake, etc.  Your kitchen will smell like a coffee shop!


I made these a delicious mocha treat for Easter.  I used the two toned icing to decorate egg shaped brownies.  Yum Yum!


Wednesday, April 27, 2016

Decorated Easter Egg Brownies


This year for Easter I wanted to decorate eggs and make a fun dessert - I didn't have time to do both so I compromised!  I made egg shaped brownies and decorated those!  I guess you could say I got my "cake" and ate it too! 

Bill of Materials
Brownies
Icing
M&Ms
Egg Shaped Cookie Cutter


First, I baked a sheet of brownies per the instructions.  As soon as they came out of the oven, I used the thick cookie cutter to cut the brownies into the egg shape and allowed them to cool.  I wanted to cut the brownies before they cooled all the way so they wouldn't get too flaky before trying to cut. 


Then, I removed the brownies from the pan by removing the surrounding brownie and using a spatula to lift out each egg.

Next, I iced the brownies using vanilla icing.


Decorating time!  I used the M&M's to decorate shapes and patterns to create fun Easter Eggs!


This dessert would be a great activity for older kids as well! Try different candy, or different colored icing - mix it up!


Monday, April 18, 2016

Confetti Icing


I love all things Confetti - cake, cookies, pancakes, oreos, teddy grahams, and my new favorite - Icing!  I have a new and easy way to decorate baked goods from just two ingredients!

Bill of Materials
Icing
Sprinkles

I suggest using a light color icing because you might not see the sprinkles through a dark chocolate.  You can use the sprinkles that come with icing or buy sprinkles in bulk!

First, pour your icing into a larger bowl big enough to whip it around.  Stir it around to soften the icing up a bit.


Second, dump your sprinkles into the bowl.  If you aren't sure how many you want, start with a few and whip it up. 


Add more sprinkles as necessary.  I like for my sprinkles to dominate the icing!!


Then use icing as you would normally. Either spread with knife or using pipping bag. 


Make sure you use a large enough icing tip for all the sprinkles to flow through - other wise they will get stuck!


Tada!


Monday, March 14, 2016

Easter Cupcake: Peeps


I wanted to make a fun and interesting Easter Treat for this weekend!  When I started thinking of Easter treats, I immediately thought of PEEPS!  These little fellas show up in grocery stores about a month before the holiday and I think they are so cute!  (cheep, cheep!)  I decided to use them to decorate Easter cupcakes!


First, I baked a batch of cupcakes in brightly colored cupcake wrappers.  I wanted the little chicks to look like they were sitting in a field of grass, so I used green icing and a Wilton leaf decorating tip (#70) to create leaves.  


Cupcakes can sometimes be fragile, so after they were iced, I put them in the container that they would be traveling in for our Easter morning festivities.  When it comes to constructed cupcakes, the less movement from platter to container, the better.


Lastly, I sat each peep on top of a cupcake and "smushed" it down a bit.  The peeps popped back up, but this held the marshmallow to the icing a bit better.

No worries for those of you that are not a fan of sugar coated marshmallows-  I used pastel colored M&M's to decorate a few cupcakes to look like the Easter Bunny hid some eggs!


 What is your favorite Easter Treat? Do you like Peeps?  Let me know what other creations you have made with these delightful chicks!

Friday, February 5, 2016

A Week of Valentine's Day Treats


Need a few fun ideas to show your appreciation for your significant other?  How about a whole week's worth of treats for that special someone?!  Who wouldn't love waking up to a sweet little note and a surprise?  Below are a few ideas for cute sayings to go with simple, yet delightful treats.

I "Chews" You!  - Chewing Gum
For my STUD Muffin...  -  Breakfast Muffins
"Can" you be my Valentine?  - Soda (in a can, duh)
I'm WILD about you!  - Animal Crackers
I know this is CHEE-Z, but I love you!  - Cheez-its
We go together like Milk and Cookies!  - Milk & Cookies
You Light up my life!  - Flashlight


Do you leave fun notes and gifts for your valentine?  What cute sayings have you used for darling notes and gifts?  Do you like finding these types of gifts from your special someone?

Saturday, January 30, 2016

Two Recipes: CAKE MIX Cookies and Brownies


I thought I would share a little secret…

I LOVE CAKE !!!


(okay that’s not much of a secret)… 

but I have two AWESOME recipes that use cake mix to make cookies and brownies!  This little trick is useful for an impromptu get together if you need desserts in a jiffy and just have cake mix in a cupboard (or if you just want a delicious snack).


Cake Mix Brownies:

Ingredients:
1 Cake Mix (any kind will do!)
1/4 cup Water
1 Egg


Directions:

1.  Mix all ingredients together.


2.  Grease pan and then press thick batter into pan.


3.  Bake at 350 degrees for 20 - 25 minutes.


5.  Enjoy! 


Cake Mix Cookies:

Ingredients:
1 Cake Mix
1/2 cup Oil
2 Eggs
Icing {if desired}

Directions:

1.  Blend all ingredients.


2.  Place dough balls onto ungreased cookie sheet.

3.  Bake at 320 degrees for 10 - 12 minutes.

4.  Enjoy!


5.  Add icing for a cake mix cookie sandwich!


Friday, January 29, 2016

Taco Tuesdays


Taco Tuesdays are a regular occurrence in our house, but sometimes the quick dinner turns into throwing the bag of nachos onto the table, opening the bag of cheese, and dipping straight into the salsa jar.  Have you ever fallen into a dinner rut?  Not every night can be a fancy soiree, but you can change your dinners from good to great with just a few tips!

1.  Keep it easy!  

Keep the meal easy, it doesn't have to be a seven course meal!  Buy pre-packaged soft taco shells, queso dip, shredded cheese, and salsa, leave the homemade stuff for a big Fiesta!  Cook up some ground beef/turkey or refried beans - whatever your family prefers.  Chop up some lettuce and tomatoes (or even buy them at the store pre-cut!)  Preparation should only take about 20 minutes!           


2.  Use real dishes!

The easiest way to turn your good meal into a great one is to leave the bags in the kitchen and put your food into REAL dishes!  Yes, you'll have a few more dishes to clean, but the increased loading of the dish washer is worth the great dinner experience!


3. Turn on some music!

Music is an easy way to turn a boring meal time into a enjoyable experience - think about it - all your favorite restaurants have music playing in the background.  Get in the mood of your Mexican flavored dinner by turning on your Pandora - try a mariachi music channel!  Or if that's a little too much Taco Tuesday for you, turn on some back ground music of your choice.  Your dinner time is a time to enjoy!

How do you turn your Taco Tuesdays from good to great?!  Do you have any tricks to make simple dinners into moments to enjoy?


Friday, January 22, 2016

DIY: Easy Biscotti


Biscotti is a delicious Italian biscuit cookie that is usually served aside a cup of cappuccino or espresso.  Some people think that because biscotti is double baked that it is a difficult recipe to make.  My mom gave me her recipe for biscotti and I'm here to tell you it's really simple! This recipe is for my favorite large, soft, and sweet biscotti; perfect for cappuccino dipping or with a touch of chocolate!

Bill of Materials
12 oz butter
1 3/4 cups sugar
6 eggs
1 tbsp almond extract
1 tsp vanilla
6 cups flour
2 tsp baking powder
8 oz almonds (optonal)


First, gather all your ingredients!  I suggest actually taking an inventory of your materials prior to starting any mixing as this recipe does use an abnormal amount of butter and eggs!  You wouldn't want to run out!


To begin, cream together the butter and sugar.  If your butter came straight form the fridge, let it sit at room temperature for a while, or sit it in the microwave for about 10 - 15 seconds - don't melt it!

Then, add your eggs and extracts.  Once the eggs and extracts are fully mixed, add the dry ingredients.  I use my electric mixer, but I have made this recipe with a hand-held mixer and once by hand! Mix the ingredients with what you have or feel most comfortable using!


Once dough has formed, knead and divide recipe into two.  Take two lightly (and I meant LIGHTLY) greased cookie sheets and form two logs.  I like my biscotti long and thin, so I form my logs as wide and short!  You can form your logs however you best like your biscotti!


Bake the two logs at 350 degrees for 25 to 30 minutes.  Once they have baked, pull them out and cut them into slices.  


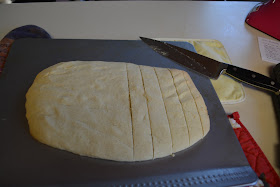
This is the point that you decide how big you end result is going to be!  Slice the logs and turn each slice onto it's side.  Put the slices back in the oven until toasted (approximately 5 - 10 minutes).  


Tada!  In under an hour - you have your very own, homemade Biscotti!  


Now make yourself a cup of coffee, latte or cappuccino and enjoy your delicious treat!  


Saturday, January 16, 2016

Recipe Cards - DIY


I love to experiment in the kitchen and try interesting recipes!  However, when I found a recipe I liked, I had a hard time finding it the next time I wanted to use it!  I was using a binder, random scrap pieces of paper, torn off backs of ingredient boxes, and pinterest to hold my recipes.  Can we say mess?  To organize my favorite go-to recipes I decided to use an old school approach - recipe cards.


To start my new organization tactic, I found a box that some 4x6 note cards would fit in easily.  I had a fancy cigar box, but you could use a small shoe box, gift box, food container, or go out and buy a brand new one!


I realized that 4x6 note cards weren't "pretty" enough for my favorite recipes, so I went to pinterest to find some free printable recipe cards.  I printed off a few different kinds, cut them out, and glued them to the 4x6 cards to give them some weight. You could also just print any recipe card printable on card stock!


Voila!  Recipe cards for my favorite recipes!  Now when I find a recipe I like, I will just write it on the card and I won't have to print anything off or cut it off a box!


How do you organize your recipes?  Do you use pinterest or do you like ol' fashioned paper?