Monday, August 29, 2011

Labor Day {Free Printables}

Labor Day is just around the corner (or weekend) which can mean a lot of things!  For some people it means back to school time, the end of summer, day off of work, parades or in my case, a REALLY great reason to have a party. 

I love hosting outdoor events during this time year.  The perfect warm days and cool evenings of the “late summer, early fall” weather are perfect for some fun in the sun and then some relaxation in the evening.  If you haven’t planned anything for this holiday yet, I suggest a great outdoor event such as grilling out or a camp fire meal.  (mmm…. Smores!) 

No matter how you look at Labor Day, the real reason for the holiday is celebrating America’s Labor (Union) Leaders for over 120 years.  I looked up the history of this National Holiday and the Department of Labor says that even “more than 100 years after the first Labor Day observance, there is still some doubt as to who first proposed the holiday for workers.”

Records show that Peter J. McGuire (the general secretary of the Brotherhood of Carpenters and Joiners as well as a cofounder of the American Federation of Labor) was first in suggesting a day to honor laborers in the United States.  However some believe that Matthew Maguire, a machinist, not Peter McGuire, founded the holiday.  Recent research seems to support the contention that Matthew Maguire proposed the holiday in 1882 while serving as secretary of the Central Labor Union in New York.

Although rather its confusing as to who was the exact “Father of Labor Day” what we do know is that it was the Central Labor Union who adopted a Labor Day proposal and appointed a committee to plan a demonstration and picnic.

Although this holiday has a long history, some still only see it as a day off from work and a perfect reason to have an outdoor party!  Either way, have some friends over, sit outside, and enjoy the holiday.  (Perhaps you could quiz them on the origins of Labor Day!)

In order to celebrate this day, I created some awesome (and *free*) printables!   All you have to do is double click and then save the image.  {Or download the file from the FREEBIES page!}  I printed them, cut to size, and slipped them into a few two sided frames.  You can place them around your dinner table or even around the house for some festive décor with a bit of a conversation starter!


I hope you enjoy these freebies, and let me know how you used them during your celebration!

Thursday, August 25, 2011

Outdoor Entertaining: Part Three

The Great Outdoors.  What comes to my mind is beautiful weather, gorgeous sunsets, blooming trees with leaves that change colors, flowers of all shapes and sizes, and Bugs?  Yes, Bugs!
Yes, those little creeper crawlers that buzz around and crawl on your picnic table.  The last thing you want is for one to land in your glass or on your platter of food!  ICK!   There are a few ways to keep these tiny critters away from your food and your guests!
1.      Use a Fan.  The wind from a fan (and it can be placed a decent distance from your table) will keep air moving and ward off most flying and buzzing bugs.  This is an easy, cheap option for bug repellant, but you will have to plug in the fan (and perhaps risk someone tripping on a cord!)  Any type of fan can be used for this approach.
2.      Citrus Candles and Torches.  For some reason citrus candles keep bugs away!  It’s a perfect bug repellant, not to mention a possible light source when the sun goes down.  The draw backs are that your guests will have to smell citrus during your party as well as trying to be careful of the fire (not as kid friendly)!  These scented candles can be found in most stores usually around the summer time.
3.       Food Covers.  This idea is my favorite and can be as easy as ordering a food cover online or going on a hunt to make one yourself!  These food covers are like tents for your plates and platters to sit under, to show off the food that you worked so hard to make but keep the bug OFF!  Unfortunately, I couldn’t find any in a store (although many stores sell them online – which means S&H costs) so I went on a search to find something else that might work; and thus my first “How-To” was born:  How-To Make Your Own Food Covers!


How To: Food Cover

Food Covers are a perfect way to keep bugs off your food while entertaining outside.  If you have a bit of a crafty side, this project just might be for you!! 

Monday, August 22, 2011

Outdoor Entertaining: Part Deux

Outdoor Entertaining is a perfect way to enjoy beautiful weather, however, sometimes Mother Nature invites herself to the party in a not so beautiful way!  When harsh weather comes uninvited be prepared!  While planning your party, think about a rain date or indoor option “just in case”.  I do understand that it would be hard to not only plan an outdoor event as well as a possible indoor one too, but just remember not all the details of a party will be perfect (just keep your cool and don’t freak out!)

Even with a possibility of unpredictable weather, there are a few things that can be predicted.  These can be evaded by prior planning; such as:
1.  Beware of placing guests into the sun.  This will result in your guests either trying to politely squint their way though a meal and conversation or wear sunglasses though out the evening.  
2.  Don’t place a table under a tree that may drop leaves or seedlings.  With every soft wind these leaves and seedlings will fall into the food or hair of your guests.  

Hopefully though, just a “small” breeze might saunter through your party.  Even just a small burst of wind though might throw your matching paper plate and napkin set into the air with the greatest of ease!  Your tablecloth might float into the air like a magic carpet, however no one is taking a ride except for your guest’s glass; full of Lambrusco.    

If you have chosen to use a tablecloth, there a many ways to secure it to the table so it won’t fly off.  Two easy ideas are:
1. Table Cloth Clamps:  These cheap (plastic or metal) clamps securely hold your table cloth to the table.  However, they can stick out like a sore thumb on a perfectly set up tablescaping.  
2.  Double Stick Tape:  Sticking Double stick tape on both the table and the table cloth should keep it from blowing away and won’t be visible.  I suggest placing the tape on the edge of the table, so that it doesn’t create bumps under the tablecloth.


You don't want your paper plates and napkins flying away!  Here are some ideas to keep your napkins and paper plates on the table when wind picks up:
1. Themed Paper Weights:  Paper weights are meant to hold paper done, so why not napkins and plates too. You can even add a touch of decor if you can find a paper weight that goes along with a theme.  Such as large diamond ring napkin rings for an engagement party or sea shells for a beach picnic.
2. Binder Clips:  Binder clips can clip together napkins so they won’t run away.  The bad part is that each of your guests will have to unclip it to get their napkin!
3. Other Household Items:  You could double your battery operated flameless candles as light source, and a plate weight.  Another option is smooth stones (please wash!!) that would add yet another touch of outdoors to the table setting.       

What are your tricks for keeping Mother Nature on your side?  Please Share!!

Friday, August 19, 2011

Outdoor Entertaining: Part 1

With Labor Day around the corner, I consider this the BEST time of year to host an outdoor party!  Why you might ask?  (Or even if you didn’t, I’m going to tell you).  Because where I live, Winter is just TOO cold, Summer is TOO hot and humid, and Spring time is just TOO rainy!  The end of summer/early fall time of year has just perfect weather.  Nice days, cool nights, the trees are full of leaves and some are starting to change color.  Its the best combination for outside entertaining.  

Opening up a party to the “great outdoors” gives a fabulous (and hardly used) area to decorate that you can’t usually do anything with any other time of year.  However, one bad thing about an outdoor event is the fact that Mother Nature invites herself!  I have come across a few major “mother nature” issues such as bugs (eww!), unwanted weather elements (such as large gusts of wind), and lack of light after the sun goes down.    

I have figured out a few (classy and very budget friendly) ways to help overcome these outdoor entertaining issues, but unfortunately they are too long for just one post (so here goes my first three part-er)!    

First and probably the toughest of the three , how to keep the party from ending when the sun goes down.  Unfortunately you can’t turn the sun back on once it’s over the horizon (wouldn’t that be cool), but there are a few creative ways to bring light outside, without too many wires or open flames!

1.  Strands of Christmas Lights:  I wouldn’t recommend the multi-colored lights, but stringing white Christmas lights around an awning, tent, or table is a great way to get light with stuff you already have round the house!  If you use LED lights, they don’t get as hot nor attract bugs.     

2.  Battery Operated Flameless Candles:  I LOVE flameless candles because inside or out, they look real, but I don’t have worry about burning my house down!  If you don’t already own these (you can get them at Target for about $10), and trust me, you will use them from centerpieces to holiday decor, to intimate lighting (I use them for decoration in my living room). They area perfect addition to an outside part because there are no flames and no wires to worry about.  You just turn them on and they light up!

3.  Solar Powered Lights:  This would be the most expensive option if you don’t already own them.  I did find a set of six solar powered path lights for only $24 at KMart, but you can only use them outside and they don’t offer a lot of light.  These lights are great though because you don’t have to change any batteries or plug them in!


Roam around your house for a minute and think of all the things you can use as lighting for your outdoor event!  Share what you find!

Tuesday, August 16, 2011

A Reason to Celebrate....

If you need to know at least one thing about me, its that I LOVE birthdays... especially the cake part.  (I really like cake).  Ever since I was old enough to hold a pen and paper in my hands, I would write up plans for my birthday party; everything from the homemade invitations, decorations, and guests to the activities and menu.  Most people keep old pictures and trinkets from their child hood- I kept my plans for my birthday parties and my plans for my wedding someday (I’ve been planning it since I was 10!)

As you can read in my “About Me”, I’ve been trying to find an outlet for my event organizing passion.  Although I would LOVE to have a different themed party every single weekend, that just isn’t plausible, (and my wallet just won’t allow it!)  I have been trying to use my useful knowledge for opportunities at work, and within my family, but I realized that I was just missing something.

Then, I came across the idea of a blog.  To not only share my event organizing skills but to also help other “do it yourself” hostesses create events that they are proud to say they hosted! 

Although not as exciting as my birthday, I am very happy to celebrate the unveiling of my very own website:  classyeventorganizer.com.  It has all the same awesome posts but with a few awesome additions:
          -  Easy to remember web address with no .wordpress.com!
          -  QR code that you can scan with a smart phone and bookmark the website!
          -  My very own C.E.O. email address:  Jessica@classyeventorganizer.com   
                 (feel free to email me with any comments, questions, tips, or tricks you want to share!)

I am very excited about this unveiling, and I hope you are too.

Now lets get organizing!
- Classy Event Organizer

Sunday, August 14, 2011

You Should Have Paid More Attention In Science Class…

Don’t you hate rushing around at the last minute trying to prepare everything from decorations, seating arrangements, to even the preparation of food for a party or event?  Often times this might be due to your procrastination, but other times, like when making cookies, you have to wait until the last minute because if you don’t your cookies will turn into objects fit more for construction rather than consumption. 

Here are a few of my previous scenarios:
    1. I stay up WAY too late the night before to bake the scrumptious cookies rather than getting my well deserved (and sometimes needed) 8 hours of beauty sleep.  Then because I’m sooo tired, I end up accidently leave the cookies in the oven a tad too long, creating hockey pucks rather than cookies.  
    2. I have tried to fit in a special trip to the store (usually bumping any of my other planning responsibilities back) to pick up freshly made store bought cookies.  Even if I put them on my own platter, they still will never taste as good as my mom’s recipe (and my guests notice). 
However, There is one sure fire way to keep cookies soft and moist (and perhaps bring some back to life) that works like a charm every time!  All you have to do it put a fresh piece of bread in the cookie container.  Seems too easy… right?  Nope, it is just that easy!  And it’s not magic, its SCIENCE!

When any baked goods sits (even in a closed container, the water in the cookies will evaporate making the baked good become dry and hard.  So, why when I put bread with my cookies, the bread becomes hard and not the cookies?   This is due to Hygroscopy.  I know, it sounds scary, but all hygroscopy means is that a substance can change its properties with the absorption of water (for further understanding, look at Wikipedia).

 Both the cookies’ and the bread’s water evaporates, but due to the sugar in the cookies (sugar being hydroscopic), they are able to absorb the water that the bread’s water is evaporating, making them soft again.  The bread does not have sugar, so it cannot do this.

 You can also use this trick with any “sugary” item, such as “unclumping” brown sugar or softening stale marshmallows (or even for science projects with kids!)

Now if I want make a batch of my homemade chocolate chip cookies for an event, I don’t have to wait until the last moment!  Tricks such as these make any hostess be able to spread the stresses of party preparation over a couple days rather than a couple hours.

Do you have any other ways to keep from slaving in the kitchen the night before, or a way to keep your store bought gems fresh until the day of an event?  Please share!

Monday, August 8, 2011

WTF: What, the Fork?!

Do you remember that scene in Pretty Woman where Julia Roberts sits with the hotel manager and learns about table manners?  She is taught how to take the dinner napkin and lay it gently in the lap.  She looks at the table setting as if she’s never sat at a table to eat before in her life.  Her reaction to the to lesson (like many peoples’) was:  “I definitely have the salad fork, but the rest of the silverware is…. confusing.”  Now, for those of us who know how to use the assortment of forks at a formal dinner table this scene is rather humorous.  It brought me back to a time when I was trying to learn the tricks of which fork to eat the salad with.

One main question that came to my mind was “does anyone really care about which fork is the salad fork anymore?”  Probably not, but the piece does have some interesting history…  just look at the Wikipedia page for “fork”!  There are about 30 different types of forks listed! (Not including the spork or the knork- who ever heard of such a thing?) 
   
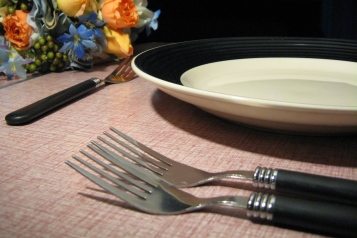
Forks
The Fork.

Yes, that three or four pronged thing usually to the left of your dinner plate has an extremely long and boring history (trust me, I read it).  In most etiquette and party planning books there are chapters on table settings and flatware (except flatware isn’t actually flat)  as well as, where and how the many forks are used.

Without getting too deep into the history of the often overlooked, pronged eating utensil, (did you know that the earliest mention of a fork is from ancient Greece and is mentioned in the Hebrew Bible?) I would like to share an easy explanation of the three most important forks that you might see at a fancy restaurant.  Even if you don’t normally set your table this way, if you are entertaining someone out on the town, you wouldn’t want to look foolish by using the wrong fork would you?  Didn’t think so.

The Three Main Forks you may see at a formal dinner include:

Salad Fork:    The salad fork is usually a four pronged fork is used at during the salad course of a mean (most of the time this is the first course).  It can double as a fish fork or even a luncheon fork.  This fork is placed to the left of the plate, the outer most fork.

Dinner Fork:   The dinner fork is a four pronged fork used during the main dinner course of the meal.  It is the largest fork in the set and is placed to the left of the plate, but to the right of the salad fork.

Dessert Fork:   The dessert fork is a four pronged fork (an usually looks like salad fork) and is used during the dessert course of a meal (my favorite!).  This fork is normally served with the dessert course and used to eat dessert that cannot be eaten with a spoon.  If it is placed at the table setting during the dinner meal, it would be placed at the top of the plate with the prongs facing to the right .

If you ever get confused (which you might on occasion) just remember that a table is set according to the use of the flatware, use the outer most fork first!

Friday, August 5, 2011

Not Everyone Likes Your Secret Family Recipe

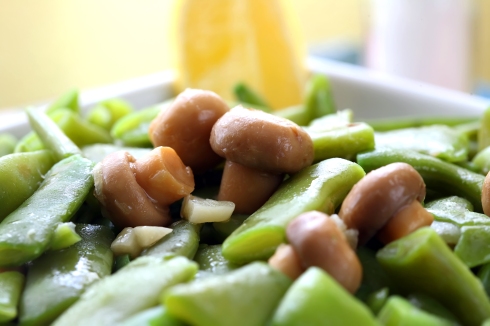
Back in college, a few friends and I decided to hold a Thanksgiving dinner.  One of my dear friends (who shall remain nameless) was so excited to share her grandmother’s green bean recipe.  She raved about it from the time we first thought of doing something for the holiday to the minute we all sat down to dinner.  She explained that its a tradition and favorite in her family and how her grandma have given her the recipe only a couple years prior!  We were all so exited about this excellent sounding green bean casserole, that is until we saw it.  I still to this day do not know what the “special ingredient” in her Grandma’s Green Bean Casserole was, but it certainly was not tasty!  

I realize that we all have those secret family recipes.  The recipe that is only shared to those who have earned themselves a family cook “title “ and it never allowed to be written down.  They usually involved a weird combo of spices for grilling, or a favorite cookie recipe which has not been turned into a Betty Crocker boxed dessert.  Sometimes the title of these recipes involve the word “surprise” which is really never revealed to those eating the meal.  I love hearing the story of these recipes, even if I”m not allowed to know the exact details.  Usually the memories bring back fond memories of sitting on a counter and helping mom and grandma make dinner or perhaps a family picnic when the family recipe was put to the test, trying to feed a small army!

These unique concoctions have been passed down from generation to generation because of one very important reason… THEY ARE DELICIOUS (which is subjective!!), other wise the recipe would have been thrown out a long long time ago.  (that or you have a really weird aunt that just won’t let that weird casserole surprise go!)  But one word of caution.  no matter how delicious you truly think your recipe is, when cooking up these family recipes for guests it is possible that someone might not like your Great Grandma’s Surprise Soup!  (especially if they can’t tell what the surprise actually is).

To combat making a guest go hungry, make a few of you dishes “plain” to have another option “just in case”.  If possible try to cook a meal as plain as possible and add any spice or seasonings until later, to let guests be the ones who decide how spicy or bland they want their food.    Also, if you are cooking meat, try to make sure there are options of medium and cooked!  If your dish because you wouldn’t want to serve your guest’s under cooked meat, even if you like your steak “mooing”.  If a recipie  isn’t easily split between special and plain, then think about offering bigger side dishes, or even another main dish option.

Don’t let your guests suffer because of you’re Grandfathers “Anything Rice”.  They may not want to come back!  (Unless this is your goal, then serve up what’cha like!)

Monday, August 1, 2011

…Even if You Have to Wash the Dishes in a Bath Tub!

One of the perks of living on your own (and no longer under the roof of your parental units), is that you can invite them own and show them your hostess skills with an informal dinner party. When I moved into my quaint apartment townhouse, after moving out of my parents house, I invited them over for such a dinner party. This was the first time that I was able to be a host in my very own home! I was so excited, and I had planned everything perfectly. I even planned out that fact that because I didn’t own enough dishes I was going to have to wash them between dinner and dessert. The plan would have worked perfectly, but then something happened…that I had no planned on… the kitchen sink drain clogged! I had only been in the apartment for about a month or so, so I didn’t have all the essentials like a plunger or drain-o to help fix the situation.
I had a mini freak out (okay, I admit, it was not by any means mini). For the life of me, I could not figure out what to do in the situation my sink had put me in! I thought perhaps I should wash the dishes in a couple full pots of water, or how I could even use the tub! I was so bummed about the clogged sink that I couldn’t think straight about my dinner party or guests. I was stuck!

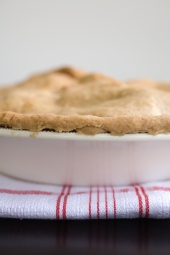
Fortunately my boyfriend, with one of his many useful “Mr Fix-it” skills had fixed the situation. It didn’t take very long at all, and he did un-clog the drain. (My “mini” freak out was for nothing, oh silly me!). I was able to finish washing the dishes and serve a delicious homemade apple pie!

Although I had planned everything for this dinner event down to the minute, unexpected things can happen. Guests can bring extra guests, guest may show up late or not at all. your food might turn out not as planned or a wrench might be thrown into the party itinerary. Whatever the issue, remember that although you planned everything down to the details, your party needs to be fluid, and perhaps won’t be perfect. In any situation like this, remember to keep your cool and don’t freak out! There is always a solution, even if you have to wash the dishes in a bath tub!

Have you ever had any party blunders or had something not go 100% as planned? 
Related Posts Plugin for WordPress, Blogger...